My dad has quite the green thumb. Growing up, our backyard always had fruit trees. We could never eat all of them, so my mom would make jam with whatever was leftover. It seems like we always had an endless supply of blackberry or apricot jam at home to put on toast or peanut butter and jelly sandwiches. It was great for me since I ate a peanut butter and jelly sandwich everyday for lunch at school. Now that I am a grownup and mom lives a couple of hours away, it was up to me to make jam with the massive amounts of cherries that I now possess.

You may remember, that back in May, I went cherry picking with my family and friends. After pitting most of the cherries I had picked, I froze them. I have finally gotten around to my first attempt at making jam! It turned out to be quite easy….after doing a proper amount of research…and all the fruit was already pitted.

Jam making and canning can take a lot of organization and effort, so I can see why some people shy away from it, but since I grew up watching my mom, it just seems natural to do it. The jam making process is pretty simple. Just boil your fruit with sugar, pectin, and a little bit of acid and you get a nice thick and sweet jam. Canning is all about sanitizing (ie. boiling). Basically boil the jars before putting in the hot jam to make sure it is sanitized, then boil the jars after the can is closed to seal it.
My main resource for my jam making experiment came from Pickyourown.org. Pretty helpful. I ended up doing 2 batches. The second came out better than the first. I think the key was to bring the jam up to a hard boil only after the sugar mixture was completely dissolved. Also, with my second batch of jam, I used half as many cherries, but came out with the same amount of jam as the first batch. I also think this was because I let the sugar dissolve before hard boiling. I think the sugar was able to extract some liquid from the cherries to create more of a syrup.
Lessons Learned:
- Set aside enough time to put everything together and clean up. I would actually suggest cutting up and pitting the cherries (or any fruit for that matter) a day before making the jam. That way you aren’t overwhelmed during the whole boiling process.
- you can try wearing gloves to protect you hands from turning purple from cutting up/pitting cherries…It took a few days for the purple to go away.
- If you aren’t diabetic, I would suggest using sugar for jam making. I have tried some of my mom’s jam made with sugar substitutes, it turns out good, but you get the aftertaste of the sweeteners still.
- Let the sugar dissolve and mix with the cherry juices before bringing the jam to a hard boil.
- Use oven mitts when handling the hot jars.


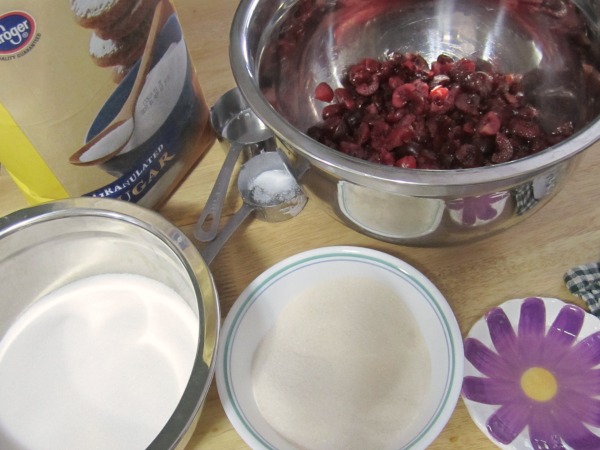
- 4 cups chopped pitted cherries
- 1¼ box of pectin or 4 Tbsp of pectin (this depends if your pectin comes in a box or a jar)
- 2 Tbsp fresh lemon juice
- 2½ cups granulated sugar for sweet cherries
- 6 eight oz jars with lids and rings
- The set up is a little tricky, but don't worry. You will need 3 pots total.
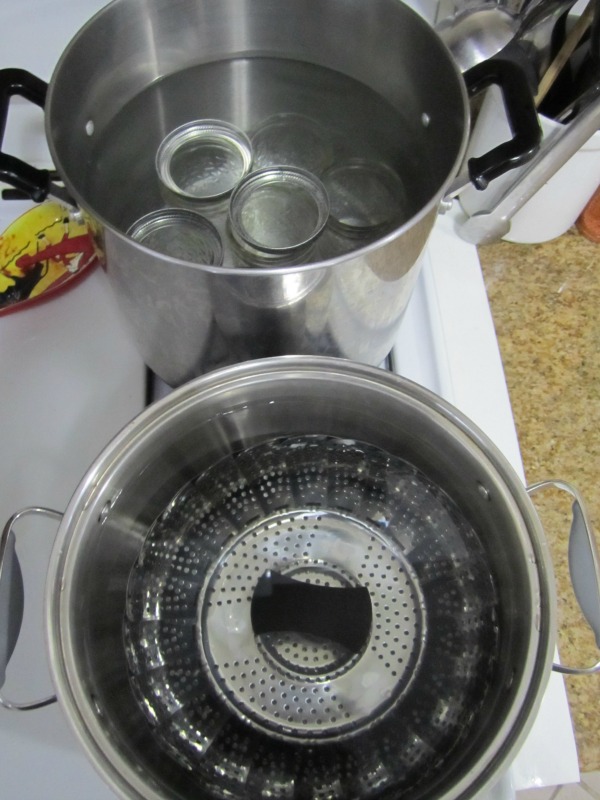
- Pot 1 will be your sanitizing pot. It should be big enough to hold a few jars next to each other and deep enough for the water to be at least 2 inches over the jars. Fill pot 1 with water leaving enough room for the fill jars to displace the water and not over flow. Cover and put over medium-high heat to boil.
- Pot 2 will be your lid pot. It can be a small sauce pot. Add water with an inch or two of water. Put the post over medium-high heat and bring to a boil. When it comes to a boil. Turn off the heat. Add the lids and rings to the pot and leave there until you are ready to seal the jars. The picture below is pot 1 & 2. My pot 2 was a much bigger than I needed. Also, at the bottom of pot 1 I have a steamer basket. This is to keep the jars from touching the bottom of the pan. I'm not use if this is really necessary, but my mom always had one in there, so I use one too.
- Pot 3 is your jam pot. It should be large enough to hold the cherries and sugar with a few inches above it to allow the jam to boil.
- Mix the pectin and ¼ cup of sugar together in a small bowl. Set aside the remaining sugar.
- Add the pectin mixture and the cherries to pot 3. Put pot 3 over medium-high heat and bring mixture to a boil while stirring constantly. Add the remaining sugar to the cherry mixture. Stir thoroughly, letting the sugar dissolve completely. Bring the jam to a boil over medium heat. When it is back to a regular boil, turn up the heat to high. Bring the jam to a hard boil for 1 minute. Stirring constantly. Remove from heat.
- Pot 1 should be boiling by now. Add the empty jars to pot 1. Let boil for 10 minutes.
- While the jars are boiling, test the jam. Put a metal spoon in a glass with ice water for a few minutes to get cold. Remove it and drop some of the jam on the spoon and let cool. Use the tip of your finger to push the jam slightly. It should wrinkle. If it does, move to the next step. If not, add another ¼ packet of pectin to the jam and bring to a hard boil for 1 minute. Check again.
- Remove the jars from pot 1 carefully. Use tongs, spoon, oven mitts, or anything to take them out without burning yourself or dropping them. Drain any excess hot water back into pot 1.
- Fill the hot jars with the hot jam leaving about ¼" from the top. Top each jar with a hot lid and tighten a ring around each of them.
- Pot 1 should still be boiling. Put the hot filled jars into pot 1 carefully. They will be heavy. Again, use tongs, spoon, oven mitts, anything to put them in carefully without burning yourself or breaking one of the jars. The water should be at least 2" above the top of the jars. Boil for 10 minutes. (Don't boil too much longer or it will make the jam darker).
- Remove the jars carefully again and let cool undisturbed. The jars will make a popping sound when they have sealed. Keep count of the pops so that you know all of the jars have sealed. If you are unsure, when the jars are cool, gently press the center of the lid. If it moves up and down with a little sound, then it is not sealed. The sealed lids will not move. If the jar did not seal, put in the fridge to use soon. If you want to try sealing it again, you will need to boil the jam, the jars, and the jam in the jars again.
- Once the jars have cooled completely (this will take several hours), remove the rings and store at room temperature. These will last for 6 months to a year; however, after 6 months, the jam may start to darken and become more runny.
- Whenever you want to enjoy some jam, open a jar and use. Once opened, it will need to be refrigerated. I like to use a butter knife to help me pry break the seal and take the lid off. Enjoy!
(adapted from Pickyouown.org)
Related posts:
 Cherry Picking and Cherry Pitter Review
 Double Pie Crust & Cherry Filling
 Pickled Peppers
 Cherry-Cheese Danish
Powered by YARPP.
Way to go Kelly. When we were growing up, there used to be about 50 pops / batch of
canned goods, peaches, beans, tomatoes, etc. etc. They were set out on the kitchen floor
and later transferred to the basement.
II would start now to can with ?sugralose?, like mom does, because the average lifetime
of a functioning pancrease these days is about 50 years.
Lessons learnt.
Dad